This section explains about the Time Entry in Output Time.
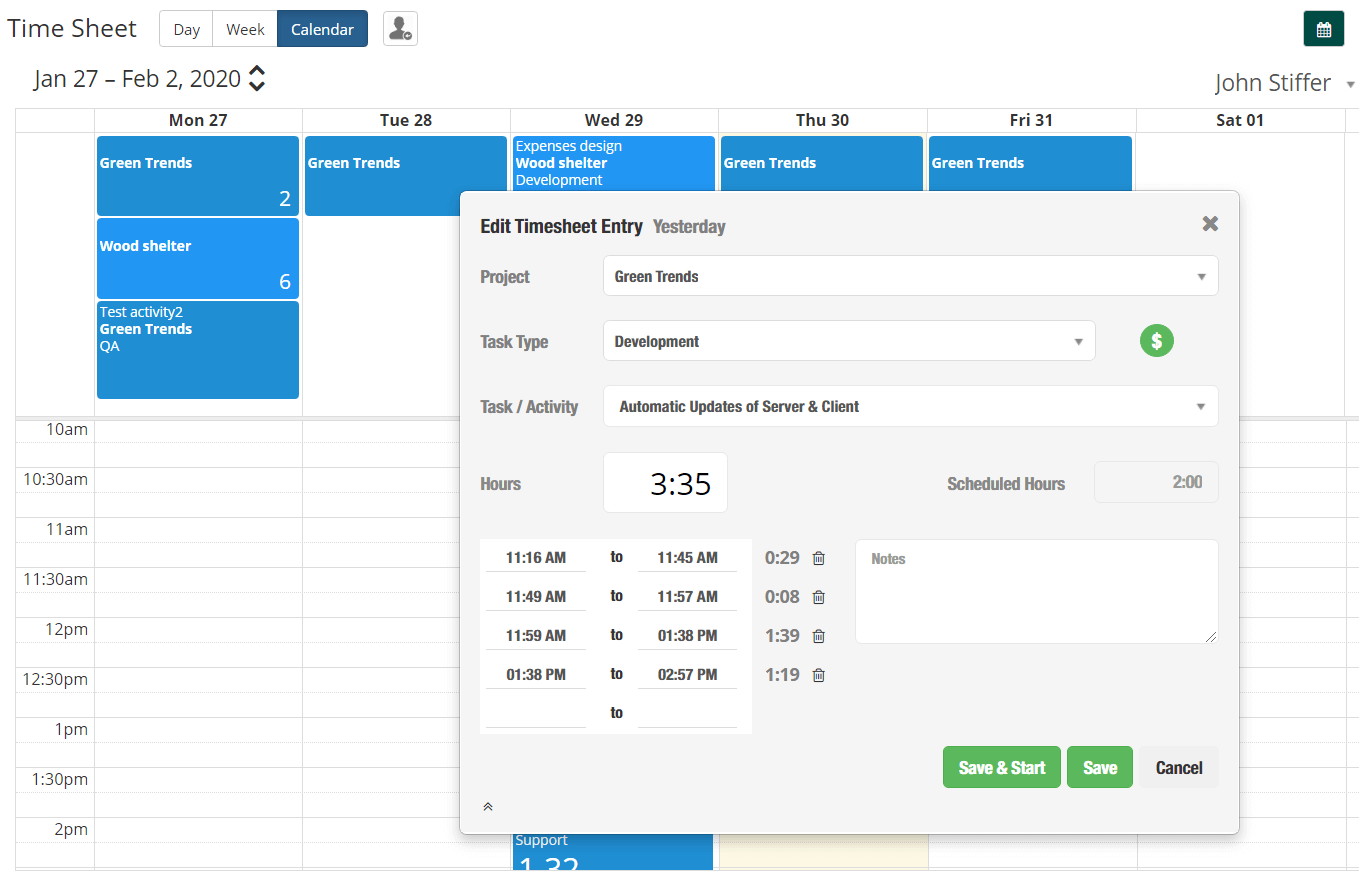
Activity: To mention the task you are working. You can enter any activity or choose an assigned task.
For details on assigning task, click here.
Project: Select the project, related to your task. Projects are assigned under individual clients.
For details on managing projects, click here.
Task Type: Selecting the task type may determine the billable/non-billable status & rate.
More details on task type, click here.
Billable: By default Billable status will be set based on the selected Task Type. It can be edited, if allowed to edit in Settings > Time Sheet.
Notes (optional): To add additional detail about the entry.
Hours: To enter the duration hours manually. Need to enter Start & End time, if specified as required in Settings, else optional.
Estimated Hours (optional): Provide approximate time to finish the task.
Page Contents
Day View
Starting Timer
- Enter an activity of what you are working or choose an assigned task.
- Select your Project & Task Type.
- Click “Start” to start the Timer.
Adding a Time Entry
To post an entry in Day View Time Sheet
- Click on
 button, to add a Timesheet entry.
 - Enter the activity, select Project & Task Type.
- Enter the duration hours. Need to enter start & end time, if specified as required in Settings.
- Click either Save (saves the time entry) or Save & Start (saves time entry as well as starts timer).
Continuing Previous Day Task
- To continue the previous day task, click
 button to load previous date entries.
 - Choose ‘Continue‘, which starts the timer for current date.
Editing / Deleting a Time entry
On mouse over, pencil & trash icons will be displayed on the right side of the time entry item. By clicking pencil icon, you can edit the entry. The entry can be deleted by clicking the trash icon.
Locked timesheet entries ( entries which are approved by Project managers ) cannot be edited/deleted.
A time sheet entry will be locked, when it is approved / invoiced / submitted for approval. To edit the locked time entries, that time entry have to be revoked by respective Project Managers or Administrator.
Week View
Adding a Time entry
To post an entry in Week View Time Sheet
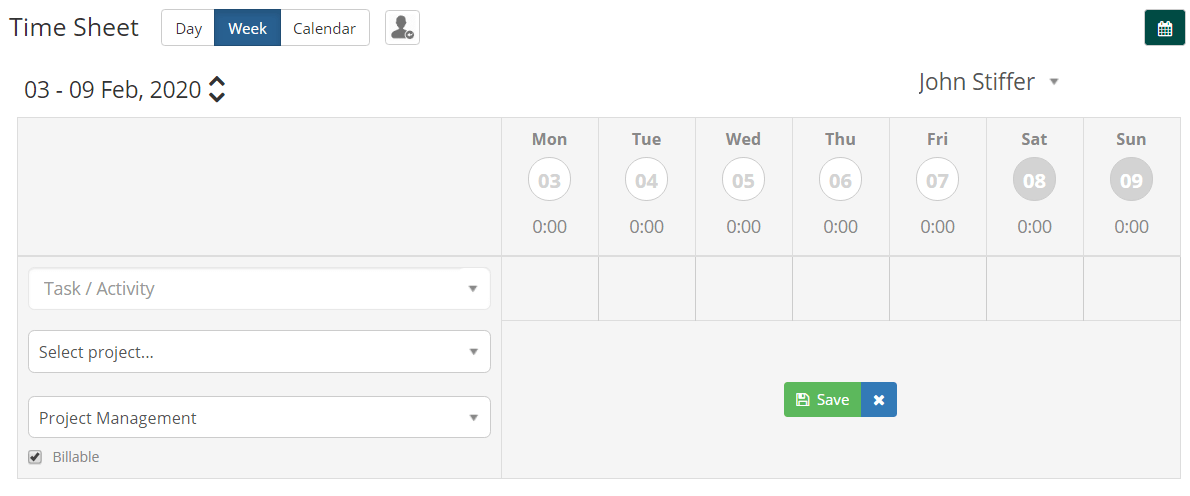
- Choose the week in the date picker.
- Enter the activity or choose an assigned task.
- Select your Project and Task Type.
- Enter the hours on related date.
- Click on ‘Save‘ button to update the task hours for the entire week.
- Click on
 button to add more task in week view.
Starting Timer
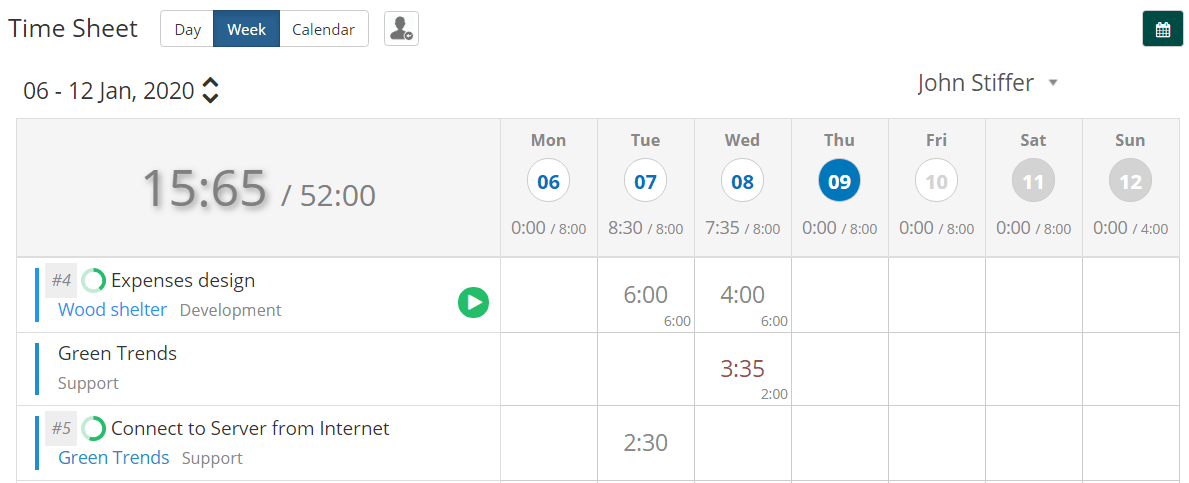
To continue an existing task, you can click on Start icon next to the task.

Editing a Time Entry
Just click in any hour field to edit the time.
Locked timesheet entries(time entries submitted for approval) cannot be edited/deleted.
A timesheet entry will be locked, when it is approved/invoiced/submitted for approval.
You can revoke to edit the locked time entry.
Calendar View
Like other views, you can post time in this view. An extraordinary feature in calendar view is, setting estimated hours for upcoming days. You can edit the time entry just by dragging and dropping between the time intervals.
Adding a Time Entry
To add a time entry in Calendar view,
Choose the week with date picker and click on the appropriate date.
Select a Project and Task Type in the Pop_up.
Provide the duration hours. Need to enter start & end time, if specified as required in Settings.
Click either Save (saves the time entry) or Save & Start (saves time entry as well as starts timer).

Adding Estimates
Estimates can be set for present and future dates. To set estimate,
- Choose the week with date picker and click on the appropriate date.
- Select Project and Task type in the Pop_up.
- Provide the activity and estimated hour for the activity.
- Click Save.
Starting Timer
To continue the estimate or existing task or activity, Click on the Start button by moving your mouse over the specific task.

Editing Time Entry
Time entries can be modified by dragging and dropping between the time intervals.
To edit the fields, click on the activity’s panel, make changes and save.
Click either Save (saves the time entry) or Save & Start (saves time entry as well as starts timer).


