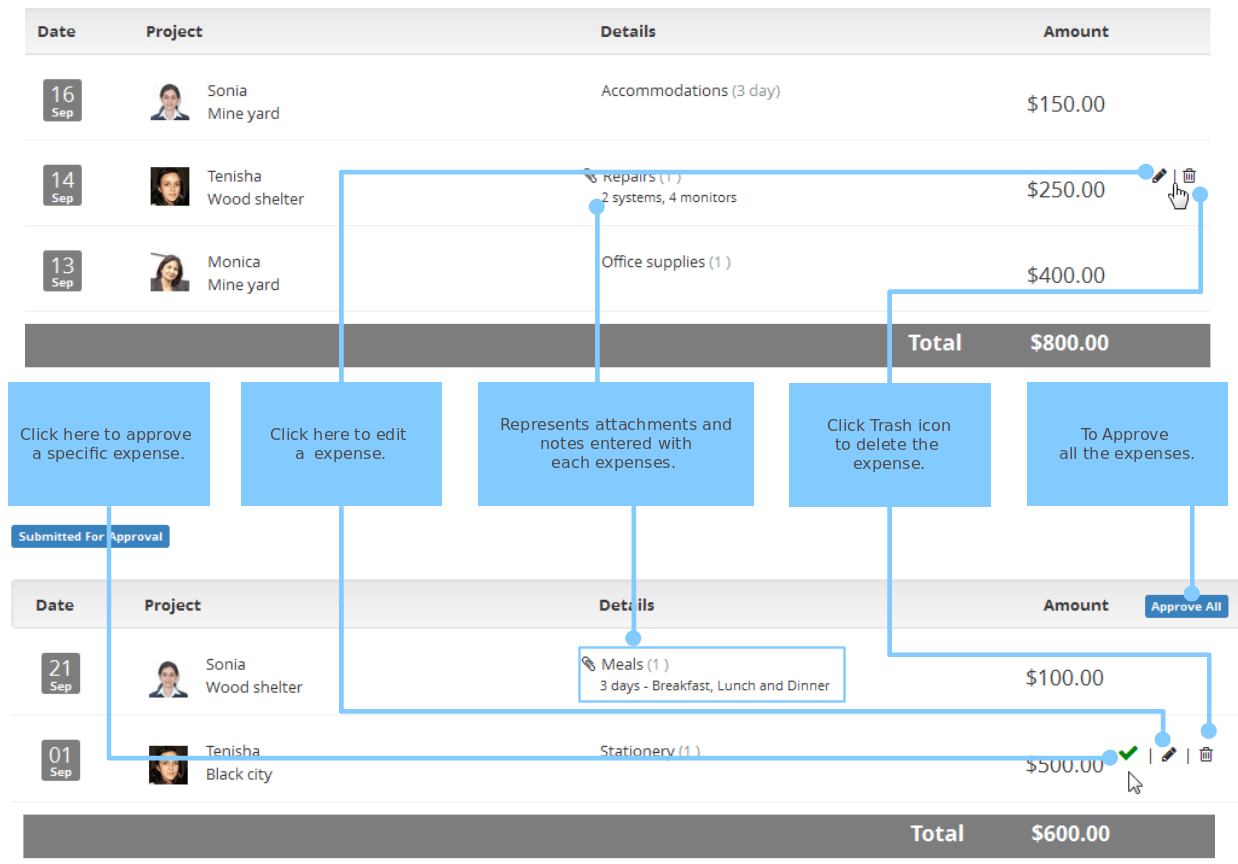
Expenses Listing
Go to Expenses.
Approved Expenses are listed on the top, followed by Submitted for Approval.
- For Members: View Expenses posted by them only.
- For Project Managers: View and Approve Expenses of all users associated with his projects.
- For Administrator: View and Approve Expenses of all users.
Adding Expenses
Expenses can be posted by all members. After the user submits the expense, the related project manager or administrator needs to approve that. Only approved expenses will be considered for invoicing. Expenses posted by Administrator / Project Manager are auto approved.
- Go to Expenses.
- Select the date, project and expense type.
- Enter quantity and Amount will be calculated, if the unit price is defined in expense type settings.
- Enter Amount directly for the expense type if the unit price is not defined.
- Notes for more details on expenses (optional).
- Attach Expense Receipt, if needed.
- Click Save.
Editing / Deleting Expenses
Member can edit the expenses before getting approval. Once the expenses is approved, it cannot be edited/deleted. Administrator can edit all expenses, whereas Project manager can edit those recorded against the project. Expenses which are invoiced are considered to be Locked and cannot be edited/deleted .
- Go to Expenses.
- Hover your mouse over the expense and click on the Edit (pencil) icon that appears on the right.
- Edit the changes and Save.
- To delete your expense, click on the Trash icon.
Approving Expenses
Administrator & Project Managers can approve the expenses posted by their team members.
To Approve :
- Go to Expenses.
- Approved Expenses are listed on the top, followed by Submitted for Approval.
- Click Approve All, to approve all the unapproved expenses.
- To Approve individually, hover your mouse over the expense and click on the Approve (tick) icon that appears on the right.
